
Submit Policy Assignment: Difference between revisions
| Line 70: | Line 70: | ||
|caption = Make the appropriate entries to the policyholder details as needed. | |caption = Make the appropriate entries to the policyholder details as needed. | ||
|text = | |text = | ||
<big>''' | <big>'''Change Policyholder Details'''</big><br> | ||
Changes to email address, phone number, and mailing address.<br> | Changes to email address, phone number, and mailing address.<br> | ||
}} | }} | ||
---- | ---- | ||
<div style="margin-top:10px;">'''Once all details are entered, click the "Save" button (move to Step 3 below).'''</div> | <div style="margin-top:10px;">'''Once all details are entered, click the "Save" button (move to Step 3 below).'''</div> | ||
Revision as of 10:18, 11 March 2025
This procedure explains how agents can request a policy assignment. A policy assignment transfers an NFIP policy from the current policyholder to a new policyholder due to a change in ownership.
|
Procedural Steps
1. Complete the Form
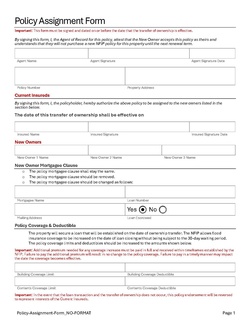 |
A specific form is not required to complete a Policy Assignment. However, the document shown here (click to open) has been created to assist agents with the process. Complete the following fields:
Add other details as applicable, such as the Mortgagee Clause or Primary Residence verification. Print or save the form, then upload it to the Policy Documents. |
2. Access Policy Record

To quickly navigate to the Policyholder section:
- Find the Policy Actions block on the right
- Choose Policy Changes
- From the next menu, click the Policyholder or Co-insured option
3. Add, Edit, Delete
This will open the Insured fields for editing.
Each insured (policyholder, co-insured, or additional insured) will have their own section for editing.

Changes to email address, phone number, and mailing address.

- Select "Individual", "Business", or "Legal Trust"
- Enter the contact details in the fields below.
- All starred fields are required.
The policyholder can be edited but not deleted.

Required Documentation: A signed request from the insured being removed or written evidence, like a deed, showing the insured no longer has insurable interest in the property.
4. Choose Effective Date

Scroll to the top of the page to enter the effective date.
- Enter the appropriate date.
- Backdating to the inception date is allowed for corrections.
- Choose "None" for the Waiting Period.
5. Review and Submit
Once the effective date is entered, click the Issue button.
- The "Abort" button will exit without saving any details.

The system will process the change immediately.
- A Declarations page with the updated information will be available in the Documents section of the Policy Record.
- If a Renewal Notice exists and the policy has not expired, then a new Renewal Notice will be sent.