
Submit Policy Assignment: Difference between revisions
No edit summary |
|||
| Line 129: | Line 129: | ||
}} | }} | ||
Scroll to the top of the page to enter the effective date. | Scroll to the top of the page to enter the effective date. | ||
* | * The Effective Date should match the closing (transfer of ownership) date. | ||
* Choose "None" for the [[Waiting Periods|Waiting Period]]. | * Choose "None" for the [[Waiting Periods|Waiting Period]]. | ||
'''''The Policy | '''''The Policy Assignment cannot be completed without choosing an effective date.''''' | ||
<!-- END OF COLLAPSIBLE SECTION --> | <!-- END OF COLLAPSIBLE SECTION --> | ||
Revision as of 10:32, 11 March 2025
This procedure explains how agents can request a policy assignment. A policy assignment transfers an NFIP policy from the current policyholder to a new policyholder due to a change in ownership.
|
Procedural Steps
1. Complete the Form
Prepare the Policy Assignment Form
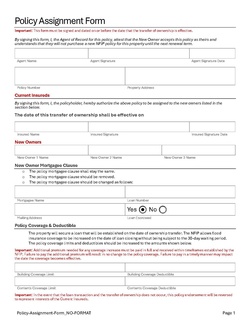 |
A specific form is not required to complete a Policy Assignment. However, the document shown here (click to open) has been created to assist agents with the process. Complete the following fields:
Add other details as applicable, such as the Mortgagee Clause or Primary Residence verification. |
The form must be signed by seller on or before the closing date. The buyer has up to 30 days to submit to the insurer. [1]
2. Access Policy Record

Open the Policy Record to start
To quickly navigate to the Policyholder section:
- Find the Policy Actions block on the right
- Choose Policy Changes
- From the next menu, click the Policyholder or Co-insured option
3. Add, Edit, Delete
The Policy Assignment may require co-insureds or additional insureds to be added or deleted. The policyholder must be edited.
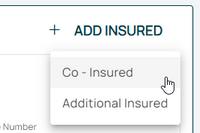
After selecting the Add Insured button, choose either a co-insured or an additional insured.
Edit Policyholder
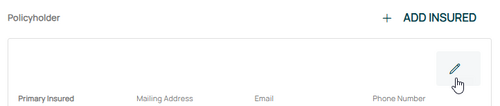
Use the Edit button (pencil icon) in the upper right of the Policyholder section.
Make the appropriate entries to the policyholder details as needed.
This will open the Insured fields for editing.

Change Policyholder Details
Make changes to the following:
- Legal status/entity
- Name
- Email address
- Phone number
- Mailing address.
If co-insureds or additional insureds need to be added or removed, refer to the boxes below.
Add Insured

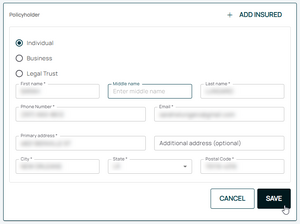
When adding a new insured (co-insured or additional insured), click the "Add Insured" button in the upper right of the Policyholder section.
- Select "Individual", "Business", or "Legal Trust"
- Enter the contact details in the fields below.
- All starred fields are required.
If co-insureds or additional insureds need to be removed, refer to the box below.
Delete Insured
Use the Delete button (trash can icon) in the upper right of the Co-insured or Additional Insured section.

The policyholder can be edited but not deleted.

If chosen by accident, this can be undone by clicking the Abort button in the upper right.
If no other changes are needed, move to Step 4 below.4. Choose Effective Date

Scroll to the top of the page to enter the effective date.
- The Effective Date should match the closing (transfer of ownership) date.
- Choose "None" for the Waiting Period.
5. Review and Submit
Review the changes for accuracy and completeness before finalizing.

Once the effective date is entered, click the Issue button.
- The "Abort" button will exit without saving any details.

The system will process the change immediately.
- A Declarations page with the updated information will be available in the Documents section of the Policy Record.
- If a Renewal Notice exists and the policy has not expired, then a new Renewal Notice will be sent.